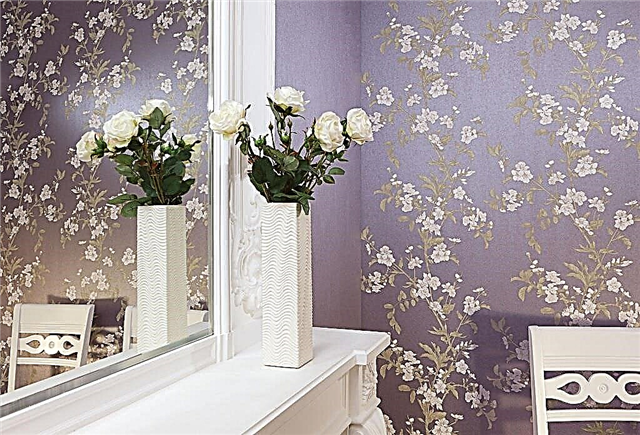
Wallpapering the walls of an apartment is a common procedure for most residents of our country. This is the most affordable and easy way to update the interior, but not many owners understand how to properly wallpaper in the corners of the room. Such a seemingly uncomplicated occupation, stumbles upon a lot of difficulties when it is necessary to paste over corners with an uneven surface. Especially a lot of problems arise with wallpapers that require fitting to the drawing. Exact coincidence of the image in the crooked corner cannot be achieved, and the overall picture will be hopelessly ruined. It is possible to endlessly dock individual canvases on the wall, but without thoroughly leveling the surface in the corner and preliminary preparation, it will be impossible to achieve an acceptable result.
To avoid difficulties in the process of gluing wallpapers, special attention should be paid to the preliminary preparation of walls and corners. Even the smallest protrusions or indentations in the corner can cause serious distortion at a meter length, and several such errors make fitting impossible - creases and tears appear, as a result of which it is not possible to dock the wallpaper with a different pattern.
To prepare the surface for wallpapering in the corners, you will need to do the following:
- The first step is to clean the surface of old coatings, dust and dirt.
- If small depressions are found, they are eliminated with putty.
- If the wall is uneven, you need to find the point of maximum protrusion at the inner corner. Using a guide rail (metal profile) installed along a plumb line or level to an adjacent wall, a mark is made on which the angle is aligned with special building mixtures.
- If it is impossible to align the internal corner with mortars, it is recommended to install a special corner from a metal mesh, after which it is necessary to plaster the corrected place. In the same way, you can prepare the outer corner.
- Aligned and dried surfaces must be treated with sandpaper until a smooth surface appears.
- After obtaining the perfect surface, it must be treated with a primer. This point of preparing the corner for pasting is mandatory, although many owners who perform DIY repairs ignore this procedure. The surface treated with soil allows to achieve a higher degree of adhesion of materials, which is especially important when working with corners.
The preparation will allow you to solve the problem of how to stick wallpaper in the corners of the room with high quality. In the same way, it is recommended to prepare complex surfaces at the locations of doors, heating radiators and windows.
How to paste over corners
To successfully overcome the problem of angles, both external and internal, it is necessary to prepare a set of tools that will allow you to perform this work with less effort. The following tools will be needed for gluing paper, non-woven and vinyl wallpapers:
- plumb line or level to determine the vertical elevation;
- wide spatula, as the basis for smooth cutting of wallpaper;
- stationery knife;
- brush width 150 mm;
- a roller, preferably on a long handle;
- pencil;
- scissors;
- rubber roller for rolling wallpaper;
- container for diluting glue and primer;
- bath with a cuvette for working with a roller.
The technology for pasting the inner and outer corners in the room, proposed below, is only valid for plain products without a pattern, which do not require image matching.
Domestic
It is best to seal internal corners using overlap technology. To do this, you need to prepare a sheet with a width exceeding the width of the wall at the interface with an angle of 3-4 cm. This piece is intended for gluing the corner and a small approach to the adjacent wall.
After gluing the sheet, it is necessary to draw a strictly vertical line along this strip at a distance of 0.5 cm from the corner. This mark will be a guideline for sticking a second sheet on an adjacent wall. To obtain a vertical, use a plumb line or a laser level.
The second sheet is glued so that its edge coincides with the vertical mark. If the seam is invisible, you can proceed to further gluing the walls, if it protrudes noticeably, you will have to make a leveling incision, for which they use a clerical knife and a wide metal spatula as a guide surface for the knife.
After trimming, extra strips are removed, at the junction, the wallpaper is slightly diluted and additionally smeared with glue, after which it is again joined.
Outdoor
Modern projects practically do not provide for external corners in the space of the apartment, but in the previous series such corners exist, so you should consider step-by-step instructions for pasting such walls:
- As in the case of the internal corner, it is necessary to prepare a trellis with a width exceeding the wall space to an angle of 4-5 cm;
- The sheet of wallpaper and the surface to be glued are smeared with glue;
- Tapestry is glued to the main place and carefully aligned, removing air jams;
- After fixing the sheet on the main wall, proceed to bend the wallpaper in the corner. If necessary, you can make small cuts to smooth out the wrinkles formed with an uneven surface;
- The next step is marking on a strip, stepping away from an angle of 0.5 cm. The marking should be strictly vertical, for which it is recommended to use a plumb line or a laser level;
- Apply glue to the second sheet and the wall, after which, aligning the edge of the sheet in a line, stick it;
- Using a guide (wide spatula, long metal ruler or profile), a vertical cut is made in the middle of the connected parts;
- Cut strips are removed, and the joint is additionally coated with glue and rolled with a rubber roller.
General tips and tricks
Each master engaged in finishing work has its own set of optimal solutions to issues that arise in the process of pasting. The following are professional tips to help you figure out how to glue wallpaper in the corners and avoid mistakes:
- For gluing walls with dense rolled materials, the most durable types of glue should be used, and you need to choose an adhesive with a transparent structure;
- Application of soil to the entire surface of the walls, and especially at the joints, is mandatory;
- Often, fitting the pattern at the junction takes a lot of time, which leads to the drying of the glue, therefore, it is necessary to add the adhesive in time in places where it has dried;
- In old prefabricated houses, significant deviations can be found in the corners. In this case, it is difficult to carry out effective alignment, therefore, to facilitate the work, you should purchase wallpaper without a picture in order to avoid fitting;
- If there is no special primer mixture, it is recommended to use wallpaper glue for surface treatment before gluing. It is enough to apply it 5 hours before the start of the main work, as a result of which the setting of materials will be much more reliable;
- Lubricate the corners with a brush. The roller will not be able to cope with the full-fledged treatment of the entire surface of this node, which will adversely affect the setting of the material;
- In complex conjugations with large deviations, it is recommended to stick a strip of small (up to 15 cm) width before sticking the main panels butt-to-butt. This precaution will protect the joint when docking the wallpaper and mask the flaws in the inaccurate fitting. This method applies only to plain wallpaper without a pattern;
- For those who still have difficulty imagining how to paste wallpaper in corners without marriage, it is recommended to use non-woven wallpaper. They best mask flaws in problem surfaces;
- If wrinkles form when smoothing the canvas, they can be neatly trimmed at an angle of 45 degrees, which will eliminate unevenness and continue to work;
- Smoothing the panel is carried out until the complete elimination of air jams. Otherwise, these places will not stick and eventually entail peeling of the entire trellis;
- When using the overlapping wallpaper method, with the subsequent trimming of extra centimeters in length, it is necessary to carefully remove the joints from the wall with a wide metal spatula, and again glue with glue, since when removing excess strips, the glue is also removed from the wall. It is better to trim the excess with a clerical knife, using a wide spatula as a guide base.
These practical tips will allow any novice home master to cope with difficulties and understand how to glue wallpaper in the corners of the room without errors.
Docking wallpaper with a pattern
Of particular difficulty is the work of wallpapering with a pattern. With minimal vertical wall errors, docking is usually successful. Pattern offset is possible, but this drawback does not affect the overall picture.
For a better fit of two sheets according to the figure, it is necessary to spread both lanes with the front part to the top on a flat surface. Next, measure from the last glued sheet to the corner at the top and bottom. These distances must be postponed on the first sheet, and another 5 cm should deviate from the marks obtained.
By connecting the points vertically, we get a bend line (first measurement) and a cut line (second measurement). On the second line, excess wallpaper is cut off.
The resulting sheet is superimposed on the second web, intended for joining, and adjusted according to the pattern so that the minimum point across the width of the first leaf overlaps 3-4 cm, after which the second leaf is trimmed to the required height.
When both sheets are ready, an adhesive composition is applied to them and to the walls and the finished parts are applied, carefully joining them according to the drawing. The process of smoothing trellises is described in previous methods for gluing corners.
The overlap area is trimmed with a stationery knife and a guide base (putty knife), the cut strips are removed, and the joint is additionally smeared with glue and rolled with a rubber roller.